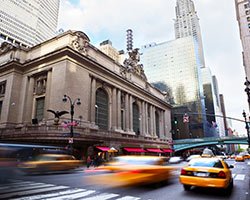
Ah, the whine of revving engines, the smell of burning rubber, the reverberation of double-clutched transmission boxes. Where are we? Well, we could be sprinting across Third Avenue in mid-Manhattan headed toward NYIP's World Headquarters. Third Avenue, a "road course" where taxis, cars, trucks, busses and bicycle messengers (going the wrong way on this one-way avenue) compete in a never-ending 24-hour all-comers race.
But that's not what we had in mind. We're thinking of a place where you have the same type of intense drivers but you don't hear those Third Avenue horns honking in the ever present Third Avenue Red Light Grand Prix. No, we're at a race track, and since this is May, Memorial Day Weekend will mark the annual running of the Indy 500, the most famous American automobile race. We decided this was the right time to explore motor sports photography from A to M — that is, from automobiles to motorcycles.
Why cover such a minor sport, you say. You may be surprised, as we were, to learn that auto racing is the second largest spectator sport in America, outranked by a nose by horse racing and trailed by a bogie by golf. Why is it so popular? It's a great out door spectator sport. And this means it's also lots of fun to photograph. Oddly, motor sports don't get as much coverage as most other sports in either newspapers or television — except for big races like the Indy 500 — or if there's a spectacular accident. This lack of coverage doesn't seem to stop the fans from piling into the stands.
At the New York Institute of Photography, when we have any question about photographing motorsports, we turn to our member/expert, Bruce B. Miller of Los Angeles, seen here in the next two photos.


Bruce is an NYIP graduate who is a full time professional race photographer. His photographs have appeared time and again in national newspapers and magazines. And he enjoys that fabled life — that life so many of us just dream about — of earning his living by traveling (all-expenses paid) to all the major meets from coast to coast, where he is recognized and highfived by all the drivers and their crews, and where his "job" is to take pictures of the action. To many on the circuit, he is THE motorsport photographer!
Over the years Bruce has told us time and again about how important quality photographs are to all the major racing teams.
They want pictures of themselves, their cars, and their races, to put on their walls. Pictures for publicity. Pictures for the sponsors of the team. And the newspapers want pictures of the action. So he shoots everything from action on the track during qualifying runs and finals to portraits of the cars, drivers, teams, sponsors, owners, and celebrities.
Regrettably, he also captures those sudden flaming accidents that occasionally cannot be avoided when man and machine seek to out door competitors in a race where there's only one winner.
Bruce is a seasoned pro who carries extensive (and expensive) gear. You'll find him on the track with three or four camera bodies over his shoulder, around his neck and in the custom-designed pockets of his custom firesuit made by Le De'a Sportswear. With his long lenses (400mm and 600mm f/2.8 models) he uses a monopod with an adjustable ball head for stability. He's a pro and he's got the gear pros use. But, in an extended interview Bruce shared with us a number of great tips that can allow anyone with any type of camera to take exciting motor sports pictures too. That's what we're really interested in.
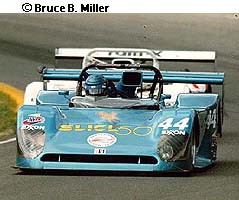
Let's level with you: For lots of those coming-at-you-in-your-face photos of cars zipping out of a tough turn, you have to have a long (300mm or more) lens, a monopod, and you're going to have to invest some time and energy locating the right shooting spot. But, with that single caveat, let's look at all the other things you can do.
Start by concentrating on the activity in the pit and the adjacent area called the "paddock" during practice runs and qualifying trials. You've got a good chance to get right into these areas, although in some tracks, you may need to purchase a special pass. If they want a few dollars for letting you close to the action with your camera, it's usually worth it!
Even with a simple point-and-shoot, you've got a wonderful opportunity for great pictures before the race because each meet is a social event too. Remember, drivers and their teams usually go from one track to another "on the circuit," so each meet is like a mini-reunion. Drivers, team members, and other racing enthusiasts like to mingle before the races, and they provide a wonderful opportunity for your lens. The trick is to get close!
But don't forget the fans. As Bruce notes: "At any race, it's a happening. People love motorsports events because they provide low-cost family entertainment. Lots of people camp out at trackside, they're outdoors, and everyone loves cars!" You should find lots of great pictures of zany people just being themselves, and having a roaring good time.
Bruce adds, "One word of warning. It's outside, and on a sunny day it's very bright out there. So when you're shooting portraits of fans or participants, watch out for harsh shadows. Avoid them by using fill flash." In fact, Bruce carries an SLR with a 28-105mm zoom lens and a flash unit for this type of closeup portraiture work. If you're a camera enthusiast, you may have exactly the same type of equipment. But even today's automatic-everything point-and-shoot cameras make it easy to use fill flash. Just follow instructions. Realize, however, that your camera won't "know" automatically that you want the flash to go off in bright daylight unless you "tell" it to go off. How do you "tell" it? Your camera probably has a setting that "forces" a flash on every shot. That's the setting to use on a sunny day. Use it all the time on a sunny day!

Bruce's portrait of driver Robbie Gordon is a perfect example of fill flash. You can see that the sun is highlighting the far side of his face. Without fill flash, we won't have the detail on the near side of Gordon's face.
Of course, at the big national and international meets it can get crowded. And you may not be able to gain access even to the pit or paddock without a special pro pass, like Bruce's.
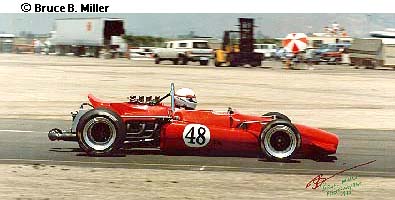
That was the situation when Bruce captured this photo of Mario Andretti receiving a special award at a recent running of the Ferrari Challenge Championship. If you look carefully, you can see the front row of the professional press pack at the bottom edge of the photo. Bruce was not part of the pack. He shot from a higher angle atop an observation tower.
While we're looking at this photo, let's touch on one other aspect of professional motor sports: The cars, the drivers and the crews are awash in sponsor logos. How can you avoid them in your pictures? Don't even try. You can't! (The sponsors make sure of this!) Anyway, they're part of the fun and color, and they add realism to your shots.
What about capturing the race itself? Chances are, the track won't let you stay in the pit or paddock during the race. So find yourself a good position in the stands or behind a fence. Where? We'll get to that in a moment.

We recommend that, like Bruce, you use a monopod to steady your camera. And, if you can control the shutter-speed of your camera, take some panning shots. In a nutshell, panning is when you turn the camera to follow the moving action in your viewfinder, and use a slow shutter as you take the shot. Your objective is to get a sharp image of the fast-moving subject (the racing car) and blur the background to give the still picture a sense of motion and speed.
Bruce cautions that to take a good panning shot, you need to pick up the car in your viewfinder a few seconds before it reaches the point where you will press the shutter button. This way, your camera is moving in unison with the car as you press the shutter when it gets close to you. Even at an auto race, don't forget the Three Guidelines we cover on this site every month. 1) Know what you want to be the subject. 2) Draw attention to your subject. 3) Simplify!
If the subject of your picture is fast-moving cars, panning is a good way to show the cars and their motion. An alternative technique is to use a slow shutter speed, and not pan. This will blur the cars, producing a sense of motion. But watch out here. If the shutter speed is too slow, you may blur the cars so much that they are nothing more than, well, blurs. They can lose their identity as "cars." Bruce uses both techniques, but favors panning because when it's done right, it can't be overdone.
How do we draw attention to our subject? The best way is to fill the frame with your subject. Since you can't get close to the action at many meets, you'll need a good zoom lens or long lens to fill the frame. (Remember, we warned about this at the start of this article.) As Bruce points out: "If you use a normal lens, you'll end up with a lot of track and very little cars." Since the fast-moving cars are your subject, try to fill the frame with them.
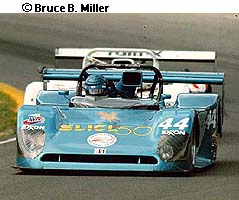
If your camera has a zoom lens, use it! But even without a zoom lens, you may be able to take a shot like this.

Notice a small point about this picture — Bruce's signature in the lower right corner. What's it doing there? Here's what Bruce has to say: "I represent one racing team. They pay my expenses to come to all their meets. And my first responsibility is to them. But I'm also pretty well known around the circuit, and other drivers and crew members, or even fans ask me to take their pictures too. My team doesn't mind. So I take lots of these other pictures, and they've become a large part of my income. Oh, the signature? I sign each print. I'm proud of my work. And it doesn't hurt to advertise! This way, anyone who sees the print and likes it, knows whom to call if they want one like it."
Two other points about this photo: First, it was shot with an SLR that had a panoramic setting. This creates the elongated rectangle that you see. As Bruce points out, "It's different, and 'different' sells!" One of the advantages of the APS format cameras is that they can all be set for panoramic pictures. Only a few of today's 35mm SLR's provide a panoramic setting.
Point Two: This photo was scanned from a big print, and Bruce loves to make big prints and sell them. Like all pros, Bruce knows that bigger prints mean bigger prices. So what? Well, Bruce feels strongly that when it comes to making big prints — and to him that can mean up to three feet by eight feet! - grain must be considered. As he explains: "Lots of amateurs figure that because the cars go fast, they need a fast film. That's not true." Bruce shoots almost exclusively ISO 100 color-negative film. That's right. ISO 100. On a sunny day, that still gives him the opportunity of shooting in the range of 1/500 at f5.6. And if he's panning a shot, then he uses a slow shutter-speed regardless.
What's Bruce's favorite film? He says that for the last few years he's been using Agfa Optima 100. "I've tested lots of films by Kodak and Fuji," he notes, "But I find the saturation and tone of Agfa Optima 100 to be the best."
Getting back to his recommendation of ISO 100 film, frequent visitors to our Website know that we strongly recommend ISO 400 speed film for regular use. Why, if Bruce uses ISO 100? There are two reasons. First, we know that most people don't make any enlargements, much less giant Bruce-size ones. (Industry research reveals that less than 2% of all photographs are ever reprinted or enlarged.) But pros like Bruce are not "most people." They make their livings selling big enlargements, so it makes sense for them to be more concerned about grain and to use slower films. Second, you probably need a fast film to let in enough light on your f/4.5 or f/5.6 long lenses or zoom. Bruce uses long lenses, as we noted earlier, that can be opened to f/2.8. This type of lens lets in much more light. So Bruce (and other pros like him) can "get away with" using a slower film than you can.
Now, let's return to where you should set up for an action shot of the race. According to Bruce, far-and-away the best location is on a turn — a corner. Corners are where a lot of maneuvering takes place. It's where the action happens. If it's a tough corner, cars have to slow dramatically entering the corner, and then accelerate out of it. You have to analyze the course and decide which part of the action in the corner is likely to yield the most exciting photographs.
Realize that there's a lot going on in each corner. You're likely to meet "corner workers," volunteers who work for the track and convey information regarding track conditions to the drivers using flags and hand signals. They make a great subject for your camera. And they often can give you tips about the best spots for covering a given corner.
Realize that each corner is protected by a low wall and a high fence above the wall. These barriers are intended to keep cars on the track and protect the observers, but there's always an element of danger at any track - especially, at the corners — when the race is on. (This is our way of saying, "Watch out!" If you decide to shoot from a corner, it's your decision. Don't hold us responsible!)
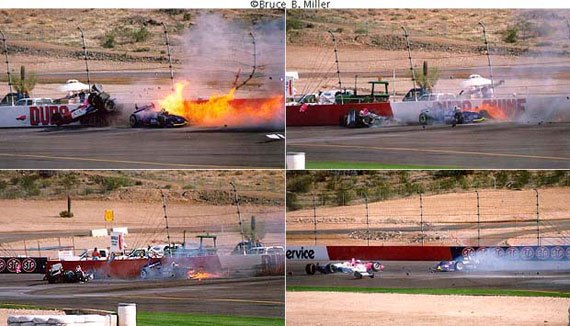
What can happen? Look again at this remarkable sequence shot by Bruce in Phoenix, April, 1996.

During a practice run, Bruce and four other photographers were concentrating on another spot when Bruce saw that the lead car was in trouble. The other four photographers watched, but Bruce was ready with a 100-300 zoom and captured this sequence showing Buddy Lazier hit the wall and burst in flames, while Lynn St. James went up and over Lazier's car. Both cars came to rest further down the track. Remarkably, St. John walked away, while Lazier suffered a broken back. Even more remarkably, a month later Lazier went on to win the 1996 Indy 500 racing with a broken back in a special car seat.

Look at these pictures carefully — they're razor sharp and the debris frozen in mid-air gives eloquent testimony to the force of such a crash. Now look closely at the first photo in the sequence.
The twisted and dislodged fence on the right side of the frame shows where St. John's car first came into contact with the fence. As Bruce recalls: "The first thing we heard on the track control radio was a question: 'Were there any photographers there?' They weren't thinking about pictures, quite the contrary. That's a popular corner, and had there been a photographer at that spot, his head would have been ripped off his body."

As you can see from the photo of Bruce at work, when he shoots in a corner, the camera is right up against the fence. There is a small hole that allows the camera lens an unobstructed view of the action on the track. It's not entirely safe, but he is ever-alert.
At some tracks there are also elevated viewing points, called towers, that can provide great photography vantage points for both pros and amateurs. The trick is to check out the track and find out what's available, when amateurs can gain access, and to learn about the track and the race. As Bruce points out: "In motor sports that track is constantly changing. Follow a car. Watch the drivers changing lanes and speed. Each corner is different, and the track conditions are also changing as well. As the race goes on, oil, rubber, and water can make the track more slippery. The cars get lighter as fuel is burned. And as the leaders come up to lap the slower cars, there can be lots of action. The more you know, the more you'll see."
Bruce also has some serious notes of caution: "Over and over, at race after race, I see amateurs make the same mistakes. They don't bring enough film, they don't bring spare batteries, they don't us fill flash, and they don't dress for safety." Asked to elaborate on that last point, Bruce explained that he feels strongly that anyone entering the pit or paddock areas should wear long sleeves, long pants, and closed shoes. "Your skin should be protected, and your footgear should allow you to move quickly if you need to."
Bruce also reminds anyone photographing motorsports — auto racing or motorcycle racing - to "Shoot with two eyes open!" This is important for both safety and great photos — it simply means that you should keep your eye that's not at the viewfinder open to increase the likelihood that you'll see photo opportunities (or problems) in your field of vision, rather than seeing only what's in the camera's viewfinder.
If you follow Bruce's tips and take his advice, we're sure you'll be able to take great pictures the next time you're at the motor track with your camera. Enjoy the camaraderie, the outdoors, and all the excitement. And, remember: Shoot with two eyes open!


