


Editor's note:This article is the first of two. Readers should bear in mind that there is no simple formula for landscape photography. There is no one way to approach the subject, and many authors have written extensively on the subject. In this article we're going to cover the basic ways you can approach landscape photography using simple equipment such as a point-and-shoot camera or even a single use model.
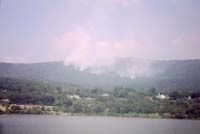
Along the west bank of the Hudson River, the trees along the ridge lines are so dry that lingering forest fires have been burning for weeks in July and August. This is not normal for summer in this region.
Coming Next — Fall ColorIn Part Two, we'll offer some suggestions for how to photograph autumn foliage and fall color. This year, the fall season may present difficult challenges. The drought that has plagued the eastern part of he United States has already caused trees along ridge tops to wither and brown. You'll need all the tricks possible to get results this year!
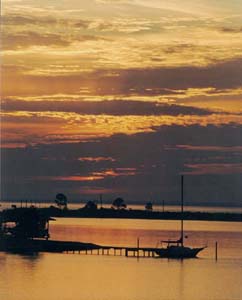
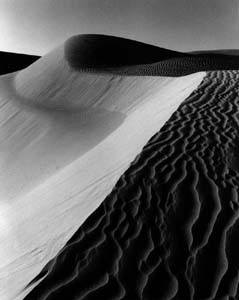
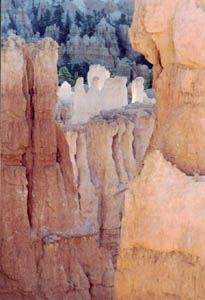
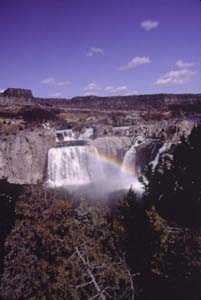
Landscape photography has one essential component — a landscape. This generally calls for a large view of some type of natural scene. If there are people in the photograph, they're generally small and are used for a sense of scale rather than being the actual subject of the photo.
A Brief History
The landscape has been a subject of preference for photographers as soon as it became possible to lug the necessary equipment out into the natural setting.
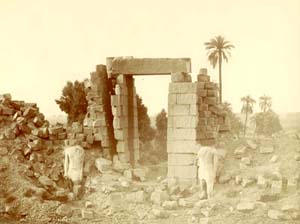
By 1849, Maxime Du Camp had visited Egypt in the company of Gustave Flaubert and published a volume entitled Egypte, Nubie, Palestine et Syrie shortly after his return. The book consisted of prints from paper negatives known as calotypes. Soon the camera was being taken to all manner of exciting, exotic places and bringing back extraordinary views that changed the way the well-informed citizen perceived the world. There are many great landscape photographers of the 19th Century, but if the names T.H. O'Sullivan, Roger Fenton, William Henry Jackson, Francis Frith and Felice Beato are foreign to you, you owe yourself a look at their work, preferably in a well-printed hard copy history of photography or a museum with a large photography collection.
Now, there are many schools of landscape photography and lots of people who have very strong opinions about what does and does not constitute a proper landscape and who is and who isn't a real honest-to-gosh landscape photographer. In fact, we'll probably hear from someone who questions putting Beato in the list above or who chides us for leaving out the brothers Bisson, Louis Auguste and Auguste Rosalie, who hauled their equipment on a mid-century trip to the Swiss Alps along with Napoleon III and Empress Eugenie.
In the 20th Century there have been a great many landscape photographers, but the work of Ansel Adams is without doubt the best known.
Sometimes, some people take such hard views of landscape photography that they're either ridiculous or downright pig-headed. Some would banish views of water and seacoast from the term "landscape." Those, they huff, are "seascapes." Others ban any hint of the hand of humankind from the scene. Cityscapes are verboten.
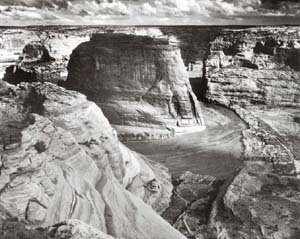
We say, we know a good landscape when we see one. In fact, we prefer to have our imagination extended by interesting interpretations rather than see the same old thing over and over. For example, there are some canyons and arches that get photographed repeatedly by hordes of photographers from the exact same angle and with the exact same lighting. Enough is enough! We even enjoy urban landscapes and cityscapes-it's all part of the world in which we live.
Since it's easy to make a landscape photograph, let's examine briefly the elements that go into a landscape photograph:
Camera, lens and lens shade
As we've noted, you can use any camera. For serious photographers, a single lens reflex camera is preferred over a point-and-shoot because there is a great selection of lenses, and the quality of the lens optic is likely to be superior. Many very serious landscape photographers use either medium format cameras or view cameras. Since the typical landscape tends to take in an expense of terrain, a larger piece of film will give greater detail than can be captured on a 35mm piece of film.
Your choice of lens focal length will depend on the landscape subject and your position relative to it. Often, wide-angle lenses make it possible to cram a great deal of the view into your photograph. However, if you're at the Grand Canyon, you may find using a long lens to isolate an interesting portion of this massive natural wonder makes more sense.
If the sun is in your photograph or just outside the frame you've selected, there's a danger of flare. For this reason, it makes sense to use a lens hood or lens shade to prevent unwanted flare in your photograph. That doesn't mean you should avoid flare at all costs. There are times when a little flare might help make a photo, particularly if you're photographing particularly harsh tropical or desert scenery.
Tripod
For many photographers who love making landscape images, a tripod is an invaluable asset. If you want to get maximum depth of field in your image, you'll want to use a small aperture opening. If you are using slow film, say ISO 50 or 100, many landscape scenes will require that you use a slow shutter speed in order to use a small aperture opening. Used properly (that's an article unto itself!) a decent tripod will keep your camera rock steady. Nothing can ruin a landscape photo more quickly than camera shake.
Another benefit to a tripod is that it will allow you to make sharp photos when the illumination is very low. Lots of great scenic photos are made in and around dawn or sunset, or in evening twilight. You'll find it is impossible to handhold your camera under those circumstances.
Film and Filters
You can use any of today's great films for landscape photography. When it appeared on the scene over ten years ago, the bright colors of Fuji's slide film Velvia set a new standard for crisp colors and clear blue skies. Since that time loads of new "enhanced" films have been brought onto the market by both Kodak and Fuji.
There are photographers who use only slide film for landscapes and others who use only color negative films. If you're considering making very large prints of your photos, you will probably be wise to use an relatively slow (ISO 50 to 200) film to avoid grain in your prints. However, bear in mind that all of today's films have such an improved grain structure over the products available twenty years ago, that grain is by no means as big a problem today as it was in yesteryear.
Black-and-white film has enjoyed a resurgence in recent times. Black-and-white was no limitation in the awe-inspiring landscape work of Ansel Adams. One of the exciting things about black-and-white film is the way you can use yellow, orange and red filters with b/w film to darken skies and bring out clouds. If you're interested in black-and-white film but have difficulty finding processing in your area, you might want to try one of the black-and-white films that can be processed in color (C-41) chemistry. Ilford makes XP-2 and Kodak offers TCN-400.
Filters can also be used with color film and offer a range of creative possibilities. Many landscape photographers avoid the use of any filter other than a polarizer and perhaps a haze filter. Others use an arsenal of different filters to enhance the natural appearance of a scene. These can affect color, and can also be used to cut down the brightness of the sky without dimming the landscape. There are many manufacturers that make various types of filters from glass and plastic. There's so much information on this subject that we'll have an entire story about filters on this Site in the near future.
It's hard to use filters with most point-and-shoot cameras. Again, this is an area where users of professional SLR and rangefinder cameras as well as large format view cameras have an advantage.
Camera Position
Once you are outdoors with your gear and have your camera loaded, the creative choices really begin. Where do you place your camera? Do you point it up or down, or keep it level? There are no rules. Generally, if there is a horizon line in your image, it is best to keep it level.
This is an area where your creative decisions can make your landscapes special and personal. If you're visiting a scenic area, it might make sense to look at some published landscape photographs to get an idea how other photographers have captured the area. This will give you an idea of the possibilities, as well as perhaps an idea of what photos have been "done to death" and should be avoided.
Direction and Type of Light
This is the other key creative area that can set your photos apart from the work of others. Sometimes, you can be in the right place at the right time and everything is magical. Other times, you can wait a very long time for even decent, much less perfect, picture conditions.
Unless you're independently wealthy or very serious and prepared to starve, your time is probably limited. Particularly if you're visiting a far away location, you may only have a day, or perhaps a few hours at some magnificent location. In these circumstances, you'll have to take the weather conditions and lighting that you encounter.
Great landscape photographers often need remarkable patience to get the photograph they desire. Ansel Adams would often wait an entire day for the proper lighting and cloud conditions. Sometimes, he would wait more than a day. A few years ago, landscape photographer David Muench told us that he had visited the Grand Canyon "over 150 times." By now, he's probably been there two hundred times. Few of us will have that privilege.
Post Exposure Manipulation
It wasn't over for Ansel Adams when he made the exposure. In fact, Adams was a darkroom master and wrote a series of highly respected texts including Camera and Lens, The Print, and The Negative. Adams practiced a thorough range of "previsualization." He knew, before he made the exposure, what dark tones in his final print would represent the dark areas in the scene before him. After making the exposure, he would modify development of the sheet of film and alter his printing technique to make certain that he ended up with the print exactly as he had visualized it before he made the exposure.
Most images, including landscapes, have been the subject of selective exposure in making the print. If you are unfamiliar with the potential of the traditional "wet" darkroom, you can't really appreciate how much manipulation is possible.
In today's "digital darkroom" the possibilities for change are even greater. Not only can tones be modified easily, but also, offending signs of civilization-a signpost, wires, or even the contrail of a passing jet, can be easily eliminated.
Digital manipulation is considered by some photographers to be a great advance. As you might expect, other, more traditional photographers, consider it an unacceptable practice. This is another area where you will have to use your own judgement.
This article was written to get you excited about the possibilities of landscape photography. It's a beautiful world out there-with a little planning, you can capture that beauty in a way that's meaningful to you. Next month, in addition to covering fall colors, we'll offer some tips about composition, framing and scale.


