

Editor’s Note: There are many opportunities to make photographs at a football game. Not surprisingly, your opportunity depends on the type of access you have to the field. There are different strategies for shooting from the stands versus the sidelines. In the first portion of this article, we’ll look at the options available to fans, and then we’ll turn to the experiences of NYIP Student Advisor Chris Corradino, who has an active business photographing high school football, and shows his work at https://www.christography.com. He’s out there on the sidelines, usually for two games every weekend.
In Part Two, we’ll turn to professional and college football, where access is more demanding, and the competition for the best photographs includes the newspaper and magazine professionals.
Introduction
It's Autumn...and that means football time. Americans and Canadians love football (the "American" variety, not soccer), and we flock to watch sandlot and Pop Warner football games, high school and college football — and, of course, the NFL.
In photographing any football game, we start, as always, with the NYIP Three Guidelines to Better Pictures:
- Know what you want the subject of your picture to be.
- Draw the viewer's eye directly to the subject by focusing attention on the subject.
- Eliminate anything that distracts attention away from the subject by simplifying.
Now, let's get down to the specifics of photographing football.
Let's start with access. We have noted that you should try to get close to the action. In football, this means on the sidelines if possible. But let's be realistic. In a big stadium at a professional game, you are not likely to be welcomed to the sidelines. Your most likely shot will look something like this:
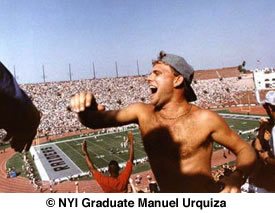
Don't sneeze at this picture. At a pro game, if you’re a fan with a ticket, you're likely to be sitting here too. Don't despair. If you really want to shoot the action on the field, use a very long lens — at least, 200mm and preferably more — and steady your camera on a tripod or monopod. But use some common sense. Every time there's a big play, what is sure to happen? Of course. The fan in front of you is certain to jump up. If your camera is firmly planted in front of you, you'll end up with a wonderful picture of his back!
To avoid this, we advise you to try to set yourself up in the stands where you won't be bothered by fans in front of you. There are advantages to being alone in a section! Another word of advice: If you are shooting from the stands and your tightest image doesn't really get close to the individual players, don't waste your valuable attention on taking pictures that show the players as tiny ants on a big playing field. Maybe you will take a couple to prove you were there. But the rest are simply a waste of time and effort because you won't cherish them or want to look at them again.
Of course, in “lesser” games — Pop Warner games, high-school games, and small-time college games — you may be able to walk right up to the sidelines. NYIP students may find their ID card helpful in gaining access to high school games. The most important point we can make for first timers shooting from the sidelines is this: Watch out! You are standing there unprotected, and you must always be ready to duck when a 250-pound running back comes charging like a locomotive in your direction. Not only is he bigger than you and in full motion, but he's also clad in armor — he won't feel a thing, but you can get clobbered! And your camera will probably be trampled as well. So a word to the wary. Be prepared.
From the Sideline
Let’s start with some basic points you should keep in mind if you’re new to the sidelines.
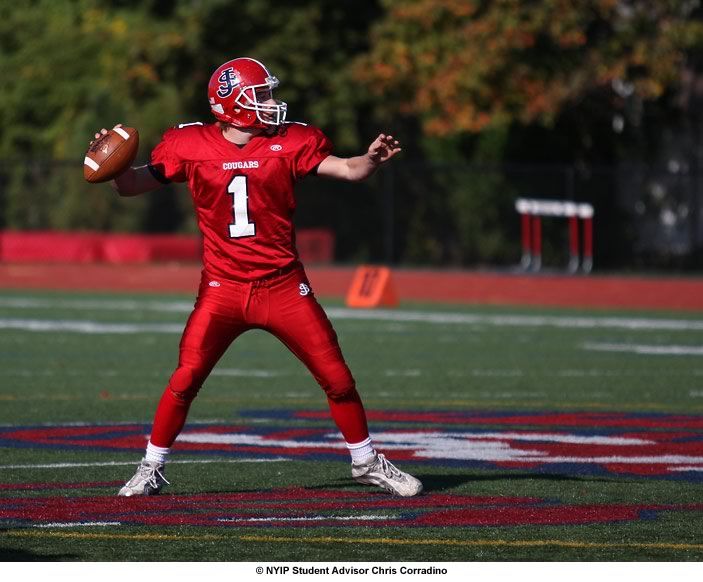
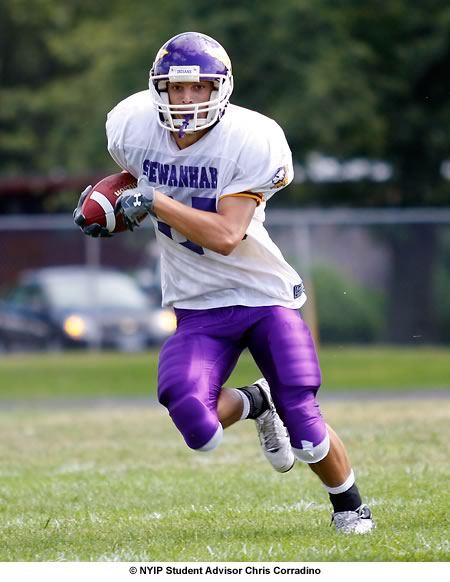
Show the action in close up. Get in tight and make the players big and important to your image. Even from the sidelines, you’ll be using a long lens.
Show the ball. While not every picture has to show the ball, many cry out for it. The good news is that in football, the ball is usually visible. In the quarterback’s hand, being handed to a running back, or gracefully arcing toward a player downfield, descending just above his fingertips.
Don’t expect to get every picture of every play. Unlike some sports where you can frequently anticipate the action, football is unpredictable. The play may come your way, or it may be on the other side of the field. It may be 50 yards downfield from you, right in front of some lucky photographer, but out of your range. You can’t cover the whole field. While you’ll miss some great opportunities, you have to keep your focus on being ready to capture the ones that do come your way.
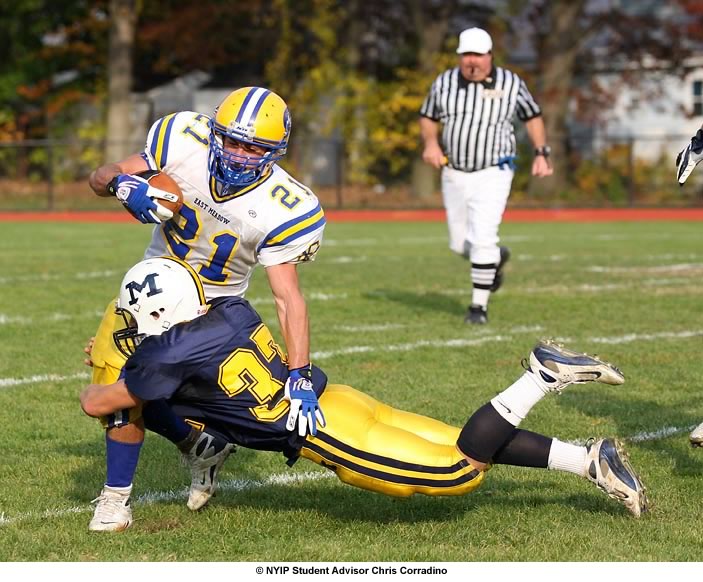
Most of the time your objective will be to capture action as it comes toward you, or races past you. While faces of football players are usually hidden behind face guards and shadowed by their helmets, getting good exposure of the player’s face often separates the good from the great.
Don’t forget to get reaction shots too. What are “reaction shots”? Pictures of agony or ecstasy on the faces of the people in the stands, or the coach and players on the bench. They will be up and roaring with every big play. Go for close-ups. Look at any sports page or magazine, and you’ll see that lots of reaction shots are used.
Now, let’s get to the sidelines with Chris Corradino.
Before The Game
It is always important to arrive early so you can shoot the team running through their warm up session. This is a perfect opportunity to work out your exposure settings, and game time shooting location. You want to find a place that is central to the action, but where your view will not be blocked. With football, you will often end up working your way up and down the sidelines, so wear comfortable shoes! Thirty to sixty minutes before the game is also a great time to ask for team rosters. This will be very important for your caption information, especially if you are shooting for a newspaper. Be prepared with a pen, pad, and business cards, as parents will often ask you to zero in on their athlete. Write down the player’s name, position, jersey number, and team. Ask for their email address, and let them know you will send a few watermarked samples after the game. Give your business cards to anyone who inquires about your services. You never know, when the season is over, you just may get a call asking for you to photograph graduation or prom portraits. As a professional photographer, you can offer their families memories that last a lifetime. For now, let’s get back to the action.
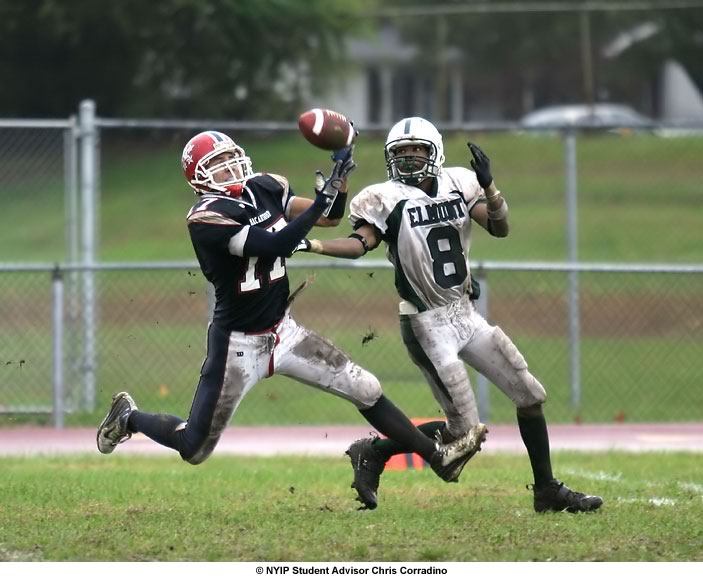
Here’s a photo that shows the ball about to be intercepted by the cornerback. It’s not uncommon at high school games to have fences and adjacent homes in the background. There’s not much the photographer can do other than use a large aperture to try to throw the background out of focus or at least soften it as much as possible.
Equipment
It can be very beneficial to shoot with two camera bodies simultaneously. By using two cameras, you are bettering your chances of capturing the fleeting moments of action, victory, and defeat. One body will hold your long lens (300-400mm), and the other, a medium telephoto (70-200mm) for when the action gets very close. Often, the long lens will stay mounted to the monopod, and the second body stays around your neck for quick access. Keep the lens covers off, and the cameras on and ready to shoot at all times. Be sure to have fully charged extra batteries, lens cloths, extra memory cards, and shower caps or rain gear to keep your cameras dry.
RAW or JPEG
The answer may surprise you! Although the RAW format offers photographers greater control over their images in the digital darkroom, JPEG large/fine is the preferred format for sporting events. Camera buffers will offer much greater bursts of speed when using JPEG instead of RAW. This extra buffer speed is critical when trying to capture the height of the action. In addition, using the JPEG format will allow you to store nearly double the amount of images than the RAW format. The last thing a sports shooter wants is to be changing memory cards as the winning quarterback rides off the field on his teammate’s shoulders.
Exposure
As noted in the NYIP lesson on sports photography, a shutter speed of at least 1/500th is recommended to freeze the action. Sometimes using 1/1000th or faster is necessary to freeze a ball, or an airborne player. While that may be no problem on a sunny day, this speed can be difficult to attain in deep shadows or a night game in a poorly-lit stadium.
Luckily, there are some things that you can do to increase your chances of success. First, shoot at the widest aperture your lens allows. Generally F2.8 is ideal, but F5.6 can also work. This will benefit you in two ways. First, fast apertures let in more light, allowing faster shutter speeds.
Second, and perhaps most importantly, a wide aperture will provide a nice clean background (bokeh), and allow your subject to really stand out. Even with these fast apertures, you will usually need to use an ISO speed of 400, 800, or even 1600. Be careful with using ISO 3200 as it can be quite grainy. One of the nice things about digital is that you can change your ISO sensitivity on the fly without fumbling through rolls of film. For night games, we recommend using an external flash unit. It is also a good idea to use a flash bracket to help reduce redeye. While the flash won’t really be effective with distant action, it will generally cover the range of a 70-200mm. Of course if the player is further away the unit has to work harder which in turn uses more batteries, and slows recycle time. While good judgment should always be exercised, there are usually no restrictions on using a flash. An important point: Being respectful to the players, coaches, referees, and fans will make your job a lot easier.
Know the Sport
Photographers who understand the sport they are covering have a better chance of getting “the shot”. For example, if it’s 3rd down and long in the local football game, you can most likely expect a pass, and therefore benefit from focusing on the wide receivers. If you are new to football, don’t worry, just follow the ball and you will be focused on the action!
During the Game
Shoot through the play. What does this mean? After the big touchdown, do not look down at your lcd screen (chimping) to see if you got the shot. Just keep shooting! Perhaps the player will be mobbed by his teammates, or maybe the opponents will throw their helmets down in disgust. If your eyes are buried in the camera menu, you will miss all the action. Also, take lots of pictures. It doesn’t cost any extra, so use that burst mode to your advantage. Out of the 15 rapid shots you made during an acrobatic play, you are likely to have a few blurry shots, a handful in which players body parts are cut off, a few that are just OK, and one that you really like. That is the image that will go to your editor, and into your portfolio.
After the Game
The final whistle has blown, and you are about to pack up your gear. WAIT! Not so fast! Shoot the victory celebration, and capture the other team’s reaction. After all, these are emotions that make sports so interesting. Don’t forget to make an image of the final score on the scoreboard for your captions. Lastly, take a few shots of the fans as they celebrate, or hang their heads in the bleachers.
More Sports Photography Articles
Check out the wealth of helpful sports photography tips and stories on www.sportsshooter.com. Also, look through the images in Sports Illustrated, and your local sports section for inspiration. Also, check back here at www.nyip.edu for the next installment of How To Photograph Football as well as tips and articles to help you become a better photographer.
A Typical Day for a Sports Shooter
Game 1 - Boys Varsity Soccer - Start time 10am
9:30am: Arrive at field, and find a suitable shooting location with a clean background. Hand out a few business cards and flyers and work out general exposure settings while players are warming up. Get rosters for both teams.
10:00am: Game begins. I shoot with two camera bodies, one with a 400mm, and the other with a 70-200mm f2.8. With both bodies capable of 6.5 fps, I shoot approximately 6 gigabytes of photos.
11:30am: Game ends. I have two hours until the next one begins. I race home to download, edit, and eat lunch.
12:30pm: Batch process to download all images. Quickly review all photos and check the top 25 selects. Use Photoshop Actions to do a rough edit.
Game 2 - Varsity Football - Start time 1:30pm
1:00pm: Arrive at site of Varsity Football game. I get rosters for both teams, and hand out business cards. I give the game announcer a flyer to read several times throughout the game. This will let parents and players know that there will be photos available, and the website where they can purchase them.
1:15pm: Take shots of teams warming up, while working out exposure settings.
1:25pm: Photograph home team running back onto the field from the tunnel.
1:30pm: Game time, I start shooting immediately. I try several different perspectives, and shoot from both sidelines and behind the endzones.
2:15pm: Half time. I make my way into the stands and give out more cards and flyers. Parents ask me to focus on their player. I jot down positions, jersey number, and contact info.
3:00pm: The game ends and the players shake hands. I have approximately 6 gigs of images.
3:30pm: Batch process to download all images. Quickly review all photos and check the top 25 selects. Use Photoshop Actions to do a rough edit.
4:00pm: Do a second, more precise edit on top 25 images from both games.
4:30pm: Begin FTP process to upload top 50 images to clients server.
5:00pm: Galleries for both games are submitted.
5:15pm: Backup all game images to second hard drive.
5:30pm: Format all memory cards, wipe down lenses, and recharge batteries for next assignment.


