

Reverse engineering is a term in common use, and it generally means taking something apart to see how it works and reassembling it for your own use. In photographic terms, it refers to looking at an image and then working out how it was made.
Why would you want to do this? Well, in my experience, there are two main reasons:
- To learn how someone has taken a certain shot, and, from that, broaden your own craft and skill base.
- To fulfill a client's brief. Before starting a new job, it is very common for the client to show you photos they like or that are in line with the sort of thing they want. If you can reverse engineer these, you should be able to do the job the way they want it done.
As you can imagine, given the enormous range of technical options when shooting an image, coupled with the scope of software like Photoshop, reverse engineering photos is not an exact science. It's also a skill that takes time to develop. Hopefully in this short post I can start you on your way to looking under the hood of lots of images.
Light
Probably the first thing you should look at is the light used in the photograph, as not only is it vital to your own interpretation of how to recreate an effect like the shot in question, but it's also usually one of the easiest things to decode.
Start with one of the basics: shadows. First off, are there any at all? If not, that should straight away indicate that the shot was taken with very diffused light that doesn't cast a strong shadow, such as on an overcast day or with the light from a very large softbox or light panel. If there are shadows, how many are there? How hard and distinct are they? And what direction are they in? The number of shadows will tell you how many light sources were used, and the shadow edge will tell you how hard or soft the light source was. The direction they're in will tell you what direction the light was falling from.
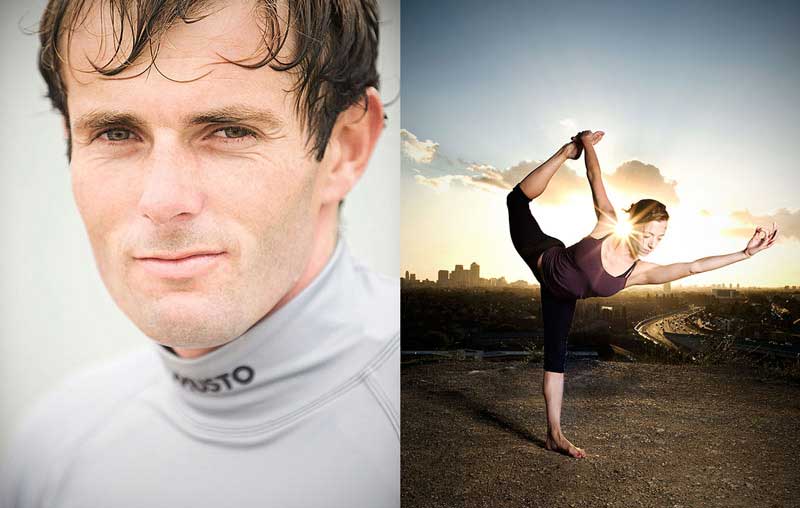
Next, if they're visible in shot, look for catchlights and reflections. These will show you what was used to light the subject and can give really useful clues. A close-in portrait will often show catchlights in the subject's eyes, and you may be able to make out the reflection of the reflector, softbox, beauty dish, or similar equipment that was used to light the shot. In any shot with reflective surfaces, it can often be very easy to spot what the light is and where it's coming from. Don't forget that light must obey the laws of physics — the angle of incidence equals the angle of reflection — so it should be easy to “track back” from a reflected light on a window or piece of polished metal.
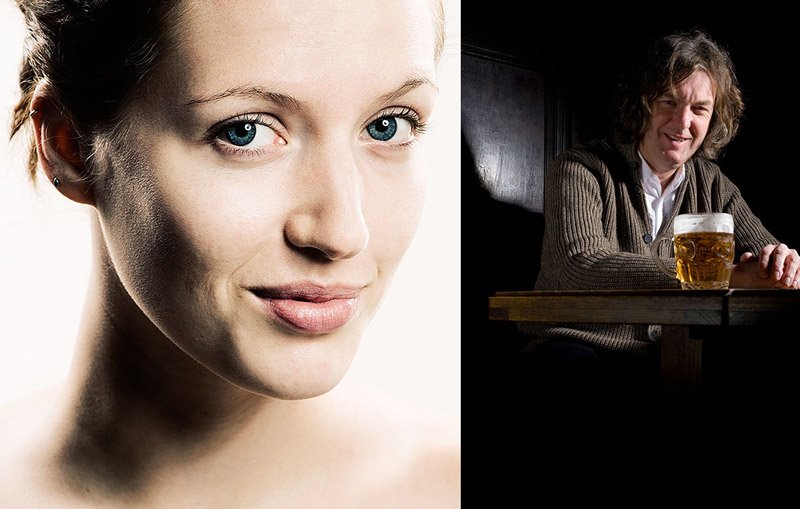
Lenses and Depth of Field
Whilst it will be impossible to predict with perfect accuracy which lens was used in a shot, you can often get a good idea from a combination of the amount of distortion in a shot and the depth of field. Something shot very close in with a wide-angle lens will look quite distorted, but it may also be sharp from close in all the way back to infinity. At the other end of the scale, a medium telephoto lens, relatively close in and even at an average aperture, will have a very shallow depth of field but will present someone's features in a more flattering way. There are, strictly speaking, more factors at work governing depth of field, including subject distance and sensor size, but these can be very hard — if not impossible — to gauge from just looking at a photo.
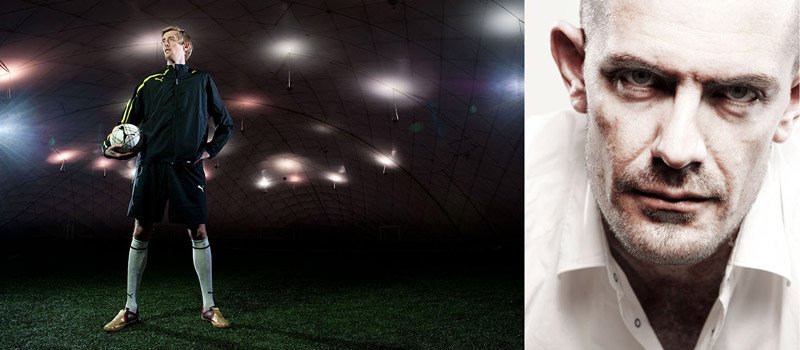
The Dark Arts of Photoshop
To anyone who's even dabbled slightly in Photoshop, it will be obvious how easy it is to manipulate images after the event, from basic corrections of tone and colour, right through to complete compositing of separate images that seem otherwise impossible. Good Photoshopping will be very hard to spot, and it can often be a brick wall as far as reverse engineering goes. However, average or poor Photoshop work is often easily betrayed, and something that at first glance appears to be incredibly expensive to put together, rapidly starts to look like the work of an hour or so in front of a screen. Obviously the scale and scope of what can be achieved in Photoshop is way beyond what I can talk about here, but I mention it merely so you're aware of its presence.

Conclusion
I've only scratched the surface here, as it's obvious that this topic is essentially the entire craft of photography but in reverse, so it's not the sort of thing you can learn in one afternoon. However, once you start to look under the hood of images, you'll often realize how simply made some stunning images are, and, on occasions, how far out of your reach some shots are on a technical level. I assure you you'll never quite look at photos the same way again!
Bonus: You can learn photography online with a photography course from the New York Institute of Photography! Get started today.


