Every year, the April showers do their job and in all parts of the Northern Hemisphere, flowers abound in May. Far to the North, spring may just be getting started, but wherever you are you'll find lots of flowers just waiting to have their picture taken. Read this article and then get going. Flowers are great subjects but they won't wait indefinitely!
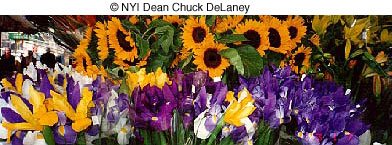
When you photograph flowers, you have to make a couple of important decisions.
As with any photograph, your first decision is to decide: What's my subject? Is it a bouquet of flowers, or the macro view of a stamen? A single flower closeup? A bed of hundreds of flowers? A field of thousands?
From this decision will flow many specifics of the picture you want to take and how to go about it.
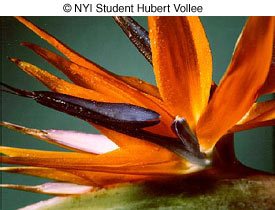 Let's start with the macro photo — that is, with extreme closeups. Of course, you can only take this type of picture if your lens has a macro mode. With macro, you’re focusing from a few inches! Many of today's point-and-shoot models do have this type of capability.
When we talk about what you see in your camera’s viewfinder, bear in mind that we’re thinking of the viewfinder in a single lens reflex (SLR) camera, where you see the image as the film or chip will see it – through the lens that takes the picture. The viewfinders on point-and-shoot cameras don’t work very well when you’re extremely close to your subject. That means with a digital point-and-shoot, you should use the camera’s LCD viewing panel to make certain the lens is pointed at your intended subject.
When you take a macro photo, focus is all-important. Your plane of focus is very shallow — just a fraction of an inch. So you have to make another decision: Exactly what part of the flower do you want to be in sharp focus? The pistil? The stamen? A petal? (We've run out of high-school biology terminology, but you get the idea.) Unless you're a botanist, you will probably make this decision "on the fly" — that is, as you look through the viewfinder. When you see the image that you want, press the shutter!
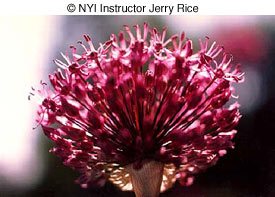
While it is possible to take a good close-up photo handheld, our advice is to use a tripod if at all possible. Particularly if the flower is swaying in the wind, changing the focal point every moment, you're better off not adding the additional confusion of a swaying camera too. Use a tripod and be patient. Most often, the wind will die down from time to time and the flower will stand still and "pose" for an instant. That's the instant to shoot!
While on the subject of wind, here are some other tips: If the wind is blowing hard and steady, the flower will probably sway incessantly and fast, so that you will be hard-pressed to get the shot. Consider waiting for another time — perhaps, the next day — when the wind has died down. If you must shoot during an unremitting wind, place a makeshift shelter around the flower to protect it from the wind. A few sheets of poster board may be sufficient. (Of course, keep the shelter out of the picture!) Or tie the flower stem to a thin post (the type you will find in any garden center).
How should you expose this shot? The easy way is to trust your meter. It will generally give a fairly accurate reading in this situation. For pinpoint exposure, however, we recommend that you use a gray card or take an incident reading. (These alternate methods have previously been explained on this site. If you are unfamiliar with them, you can find the articles on our Photo Tips Category archives in the Tech Tips section.) By using one of these alternative methods, you end up with an exposure that is precisely calibrated to the light, and is not affected by the color or reflectivity of the flower.
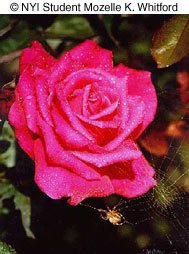
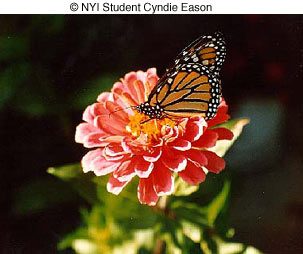
Macro flower shots can be pretty. But if you want to turn the ordinary macro shot into an extraordinary photograph, try to add something of interest. What? How about a bee gathering pollen? Or a spider crawling inside? Or a butterfly? Now you've got something to grab the viewer's attention beyond a pretty picture. This type of photograph may not come easy — you have to wait for the critter. But if you wait long enough and your patience is rewarded, you can end up with a really great photograph.
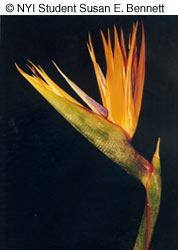
Let's move on to consider the shot of a single flower head. Much of what we said for the macro view applies here too. As before, you can't get close enough for this type of picture with film point-and-shoot cameras. Once again, you'll be better off using a tripod if possible. Remember also that you don't have to make pictures of single flowers while you’re bent over in the garden. Over the years many great photographers have made wonderful still life studies of flowers in a studio setting where there’s no wind and the photographer has precise control over the lighting. Whether you’re taking pictures indoors or out, once again exposure will be more precise if you use a gray card or take an incident reading. And the picture will often be improved if you can add a crawling critter.
Good focus is still important, but it's not so critical as it was with the macro. The zone of good focus is now a few inches, not just a fraction of an inch. So, while you still want to focus well, you don't need to watch focus quite so critically.
An added decision for you to make with this type of shot is to consider the direction of light. It's possible to take a very attractive picture with the light in its "usual" position, streaming from behind you toward the flower. But give strong consideration to backlighting — that is — light coming from behind the flower, toward the camera. Since flower petals are usually translucent, backlighting can give them an iridescent glow that accentuates the flower's color and brings it to life.
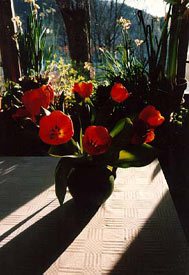
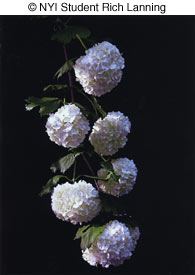
How should you decide which light is best? Easy. Walk around the flower, observing how it looks through the viewfinder from different positions. Keep a sharp eye. You may see an appealing shadow from one position. A glow of iridescence from another. Maybe you can get both together. Walk around, and then take your picture from the position that appeals most to your eye.
We should add two words of warning here. First, when the light comes from behind you, watch your own shadow carefully. Usually, you want to avoid casting a shadow on the flower. Second, when you are shooting with the flower backlit, watch out for flare. You don't want the incoming light to shine directly into your lens producing ghostlike blobs. (You can avoid flare by either positioning your camera so that the light doesn't shine directly into your lens, or by shading the lens with your hand or a hat or any other opaque object. Just be sure that the object is kept out of the image frame.)
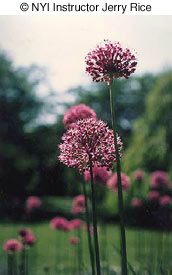
There's a second additional decision to make when you are shooting a single flower head. How high or low do you want the camera to be?
In other words, from what angle do you want to shoot the flower?
Once again, the answer is best determined by your eye. As you walk around the flower to watch the play of light from different sides, also look through the viewfinder to see how it looks from different heights. Don't be lazy. Lie down to see it from a squirrel's-eye view. Stand up and raise your tripod to see it from a bumble-bee's view. Let your eye decide which you prefer. Also, in addition to the lighting, consider the tonality of any background that will be visible in the photograph. Brown dirt, green grass, or blue sky can give a very different feeling to the photo.
Let's move on to bigger floral subjects. What about a bed of flowers...or a field of them? Here, you can probably use a point-and-shoot as well as a DSLR. A tripod is less necessary. Focus is no longer critical — it can extend for feet or even miles. And metering with your built-in meter will probably produce a good result.
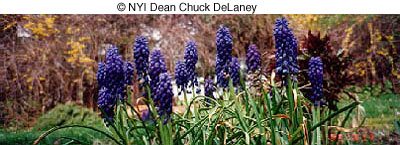
What about the direction of light? It still can make a difference. If you can check how the flowers look from different sides, by all means do so. Frontlighting may be all right. Backlighting — or sidelighting — may be better. Camera angle — that is, height — is usually less important in this type of long shot. (You should still stoop down to see if the image is improved from a low angle that will accentuate the nearest flowers.)
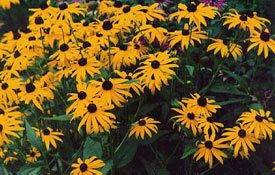
What should you look out for here? We think you should go back to the very first decision: What's your subject? A bed or field of flowers may look exquisite to your eye, but often makes an awfully dull picture. Look for something that will add interest to the picture. Something else that will draw the eye of the viewer and be the subject of your picture, with the flowers acting as swatches of color that complement it.
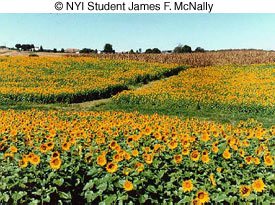
If you're photographing a flower bed, look around. Perhaps, a child playing amidst the flowers will make a far more interesting picture. Or the house behind it. Or the apple tree in the foreground? Or the fence in the background. Or anything else you can find to draw the viewer's eye and add interest.
Do the same with a field of flowers. Is there a barn that would make a better subject? A tree? A windmill? A lone person far out in the field. A babbling stream? A majestic mountain landscape?
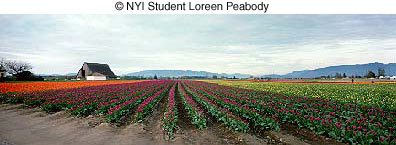
Chances are if you look around you'll find lots of potential targets that will add considerable interest to your photograph.
To sum all this up: Flowers are colorful and can make beautiful subjects when you're close up and they fill the frame. You're better off finding another subject, and using the flowers as an "accessory," when you're shooting from farther away.
In the concluding installment of this article, we'll take a look at some of the ways you can add other elements to your flower pictures to create even more dynamic images.


