

Location, Location, Location
Like real estate, location is key when shooting lightning. Create a sense of scale for your shots by including a few buildings or a tree line in the composition. An interesting foreground will elevate your shot from meh to wow!
Safety Tips
Stay out of danger while capturing nature’s power. For the shots featured in this article, I photographed from my studio window, and the storm was rather far away, so safety was not an issue. If you are photographing from a window, make sure the storm is not too close because lightning can — and will — strike through a window.
If you are outside, stay away from trees and open fields. Shoot from underneath an overhang or from inside a car. You may also want to download weather and radar apps to your phone so you can be alerted if other weather concerns such as flooding or strong winds are a factor.
Essential Gear
Tripod: A good sturdy tripod is an essential item to ensure you get the best results. Holding your camera in-hand won't cut it. Take along a remote release as well (or use the built in self timer) to help keep camera shake to a minimum.
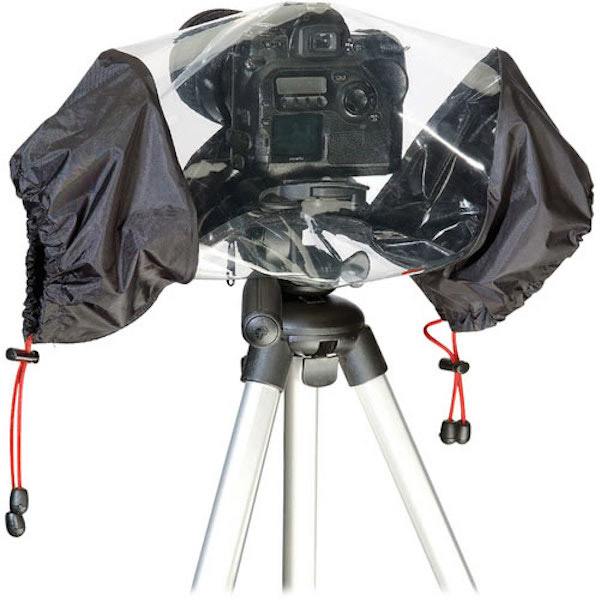
Gear protection: Rain gear is a must when shooting in inclement weather. I recommend the Kata E-702 PL Elements Cover. It works well with pretty much any DSLR, and they also have an extension kit for long lenses. In a pinch, a dry cleaning bag works well and stows away easily when not in use. Poke a hole in bag and use the lens hood to secure the bag over the lens.
Camera Settings
I try and keep the ISO reasonably low to keep noise to a minimum. For these images, I used a 15-second exposure at around f10 or f11 at ISO 320. Stop down even further for starburst effects around streetlights.
Lightning is super bright so cranking up your ISO in not necessary.
Lens Choice
A nice wide lens works best in most situations unless you are very far from the lightning strike. A 14-24 Nikon or 16-35 Canon lens are good options. Zeiss make a beautiful 15mm if you have the funds.

Helpful Tips
Lightning strikes only last for a short while. Once you notice a few strikes, quickly set up and compose the image, and shoot continually until you catch a strike. Patience is the key. Long exposures allow you to catch the strikes — sometimes more than one strike in a single capture! Keep firing the camera while the storm is at its peak, and you will eventually get a few great images. Include a tower or tall structure in the photo so that the chances of photographing a lightning strike are greater.
Ignore the Rules
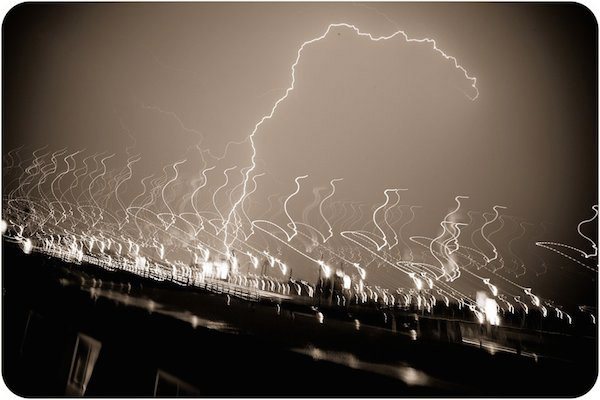
Take the camera off the tripod for some cool effects. Light painting with lightning is fun!
On my bucket list is to shoot a Chilean volcano lightning storm! Google it now if you have not heard about it. You will be amazed.
Bonus Offer: Want to become a better photographer? Taking an online photography course at NYIP will get you there! Enroll Today!


