

Most photographers will caution you to pack away the camera when the sun is high in the sky. This is a shame, as with a few creative tricks, it's possible to create dramatic photos in mid-afternoon. Sure, the light at sunrise and sunset is beautiful, but why limit your photography to just two hours a day? Many splendid travel locations are not even accessible during those magic hours. Instead of going home empty handed, try these techniques on your next outing.
1) Shooting Into The Sun
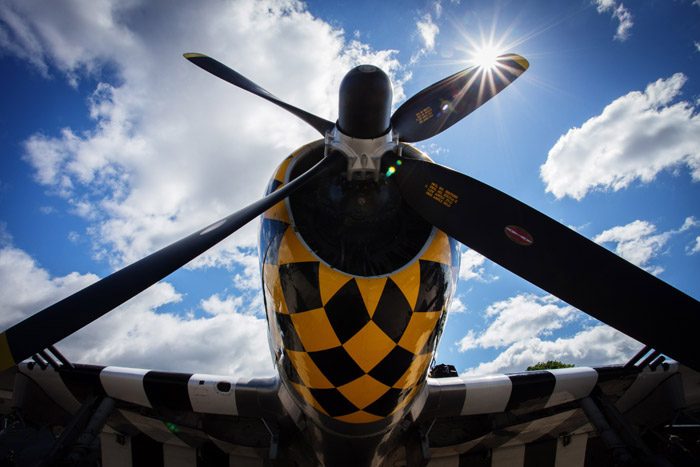
Forget the lens hood and shoot directly into the sun. The resulting sunbeams can add dynamic flare to an otherwise flat shot. To maximize the effect, start with a very small aperture opening of f22. Then, with a wide angle lens, carefully compose so the sun is just slightly blocked by an object. This partial obstruction will work to scatter the light fantastic. In this image, the propeller of the WWII era P47 Thunderbolt was quite effective for this purpose.
2) Polarize It
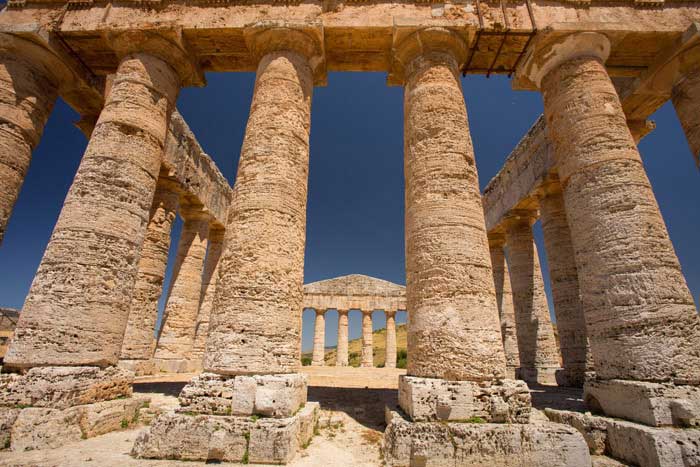
The polarizing filter is essential when shooting landscapes mid-day. On a recent trip to Sicily, my guided tour of the Temple of Segesta was scheduled for high noon. While the light was harsh, you couldn't ask for a better location. Dating back to 424 B.C. the unfinished temple is one of the grandest Doric monuments to survive from antiquity. The cloudless sky was a pale blue, absent of any real vibrance. To remedy this, I attached my circular polarizer and slowly rotated the front element. With each twist, I watched through the viewfinder as the sky grew richer. As an added benefit, the filter eliminated the glare on the temple, revealing more of the detailed texture in its historic columns.
3) Get On Down
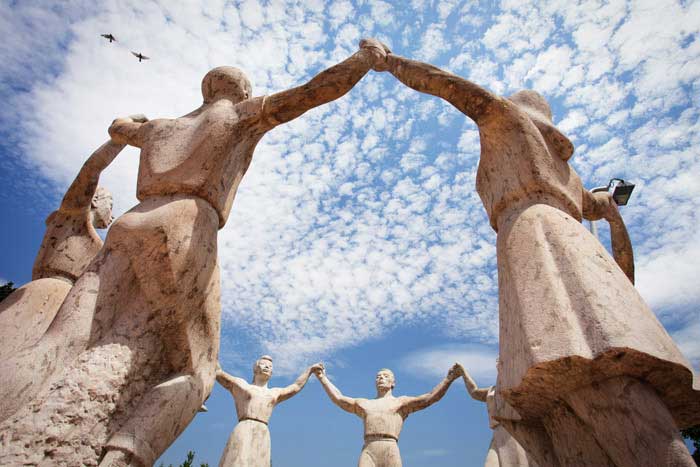
How often do you come across a beautiful sight, breathlessly pull out your camera, shoot it from that first perspective, and move on? I know I've done it, as the excitement of a new place can cloud one's better judgement. The resulting photo is usually a throw-away image that fails to capture the true character of the scene. To go beyond a postcard reproduction, get down low where the vantage point can often be more dramatic. While sprawled out on the ground, you may not be able to see through the viewfinder due to the awkward angle. This is an ideal time to use the Live View mode or swivel screen if your DSLR has it.
4) Eliminate the Sky
We've all experienced those drab overcast skies that can't be saved even with a circular polarizer. If you choose a wide angle lens in these instances, you'll show too much of the unwanted areas. Instead, opt for a telephoto lens like a 70-200mm. By zooming into the important aspects of the landscape, you are essentially cropping in the camera, making a stronger image. Before pressing the shutter, be sure to check all four corners of the viewfinder for any distracting elements.
Bonus Tip:
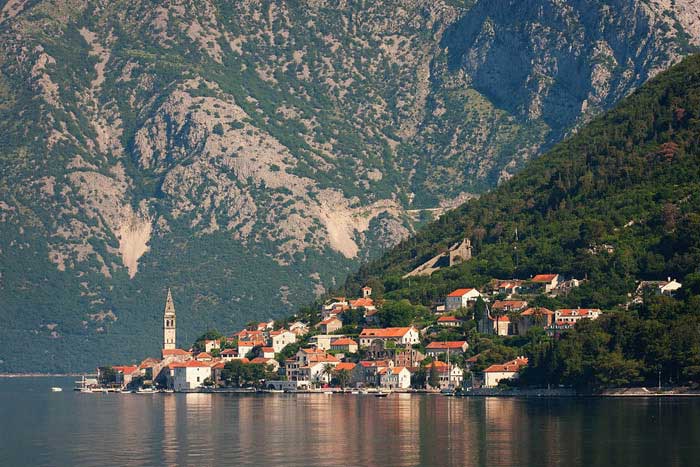
Telephoto lenses are more prone to camera shake with their heavy barrel, and extreme magnification. Even with Image Stabilizers and Vibration Reduction, you'll want to use the proper long lens technique for consistently sharp photos. To determine the minimum shutter speed, follow this equation. Multiply your chosen focal length by the crop factor of your camera. For example: 200mm multiplied by a crop factor of 1.6 gives you an effective focal length of 320mm. Therefore, the slowest shutter speed you should hand hold the camera at with this set up is 1/320. For this landscape image in Montenegro I not only used a fast shutter, but also mounted the lens to a tripod as we were on a moving ship.
As you can see, you don't need perfect light to make quality photographs. Anyone who tells you that they only shoot photos at sunrise and sunset is missing a great opportunity to push their creative limits. Try these techniques for yourself and expand your portfolio along the way.
About the processing:
All images were shot in RAW on a variety of Canon DSLRs before being imported to Lightroom. This is where I make minor edits like cropping, and dust spot removal. From Lightroom, I open my selects in the excellent software from Alien Skin, "Exposure 5". For these images I used the Fuji Velvia presets and a slight vignette.
Bonus: Want to learn how to take professional-quality photographs? Try NYIP’s Photography Courses. Request your free photo course catalog here.
About the Author
In addition to being the lead student advisor for NYIP, Chris is a full time photographer specializing in travel, outdoor, and photojournalism. When not walking the streets of Manhattan with his camera, he enjoys sitting in bird blinds waiting for elusive wildlife. To view more of his work, visit www.christography.com


