

Whether you're shooting indoors or out, most small-product photos can benefit from a little bounced light. In photography terms, "bouncing" simply means placing a reflective surface in the path of your light source, thereby pushing some of that light back into the subject.
Bounced light helps minimize strong shadows and creates a more even lighting environment, which helps bring out the smallest details of a product. Best of all, you can create bounced light with the simplest and cheapest of materials.
Making Bounce Tools
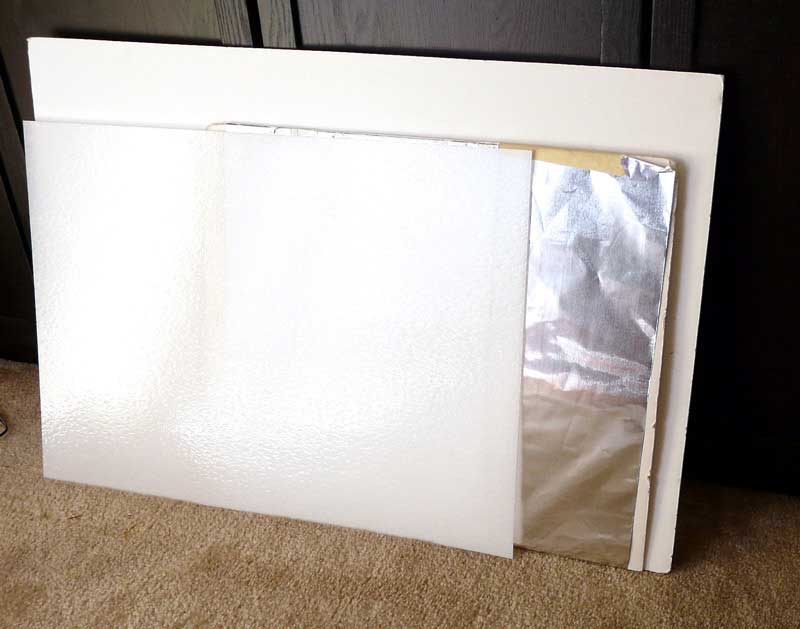
There are professional-grade photographic reflectors on the market, but you can do excellent bouncing with ordinary white poster board or foam core board. Look for the brightest whites you can find, and collect a few different-sized pieces. When you're shooting close up, a smaller sheet of white board will be easiest to maneuver around your subject. Larger subjects generally need more reflected light, so keep some larger sheets on hand as well.
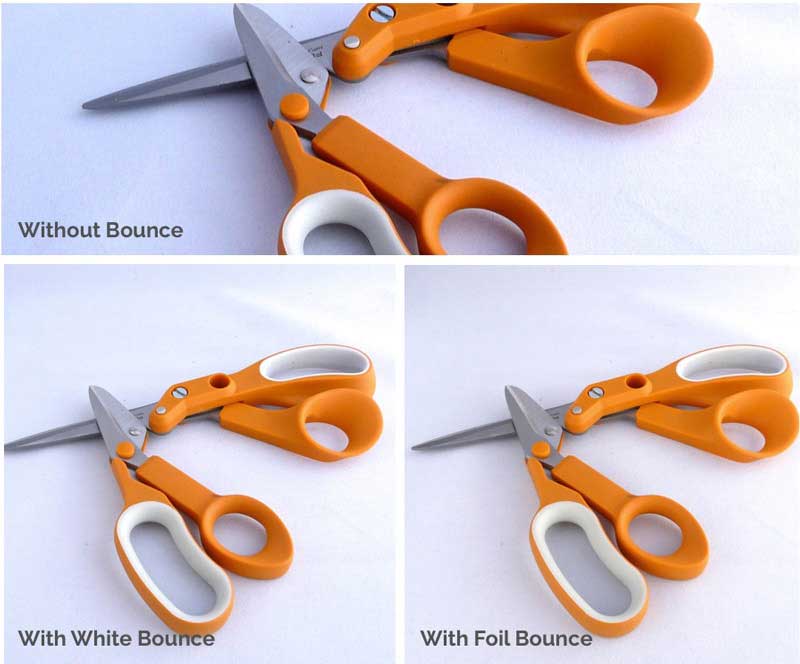
You may also want to keep one bounce on hand that's covered with aluminum foil. The foil definitely reflects more light than the white poster board, but in some light conditions, it can also create veins of light or hot spots in your shot, so use it with caution.
Using a Bounce
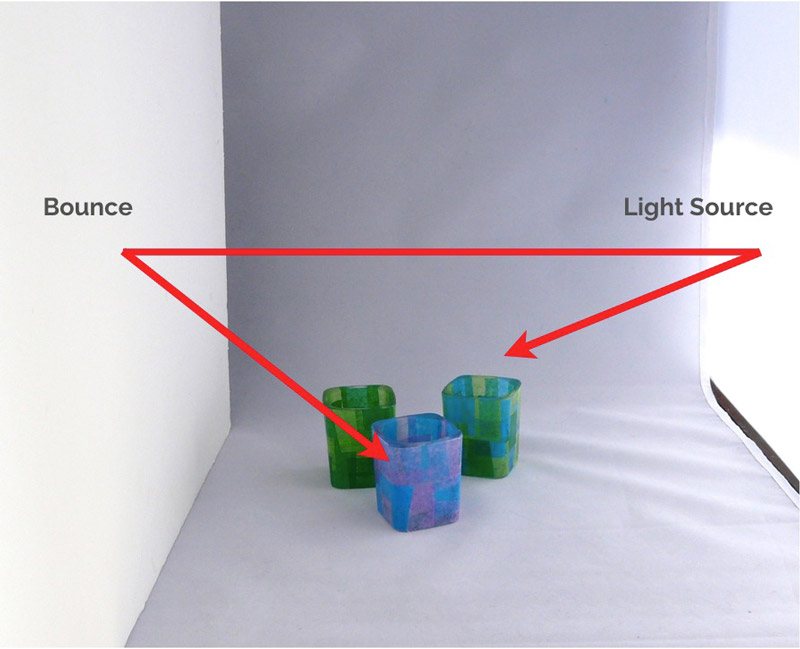
The most common way to employ a bounce is simply to place it opposite to your primary light source and outside the camera's field of view. In this shot, for example, the light is coming in from the right side, through a window. This creates strong shadows. By placing a bounce on the opposite side, you bring light into those shadows and even out the illumination.
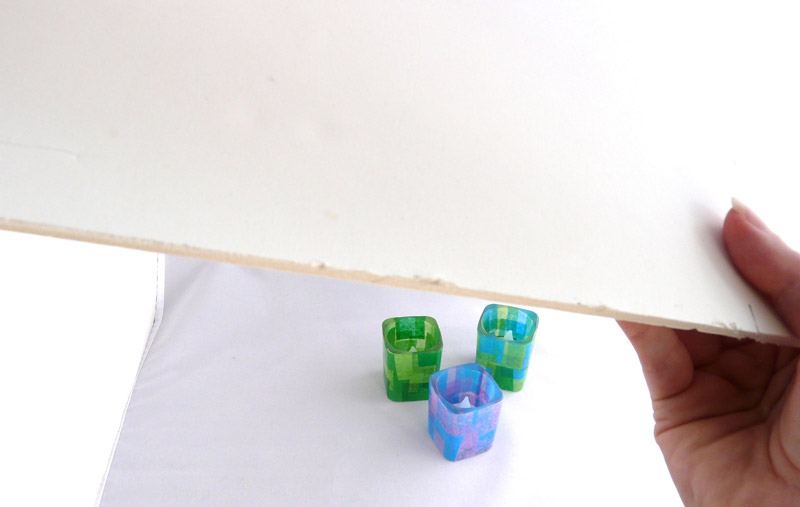
You can hold a bounce in one hand and operate your camera shutter with the other, or recruit a friend to hold the bounce in place, or prop it up with some cans or books.
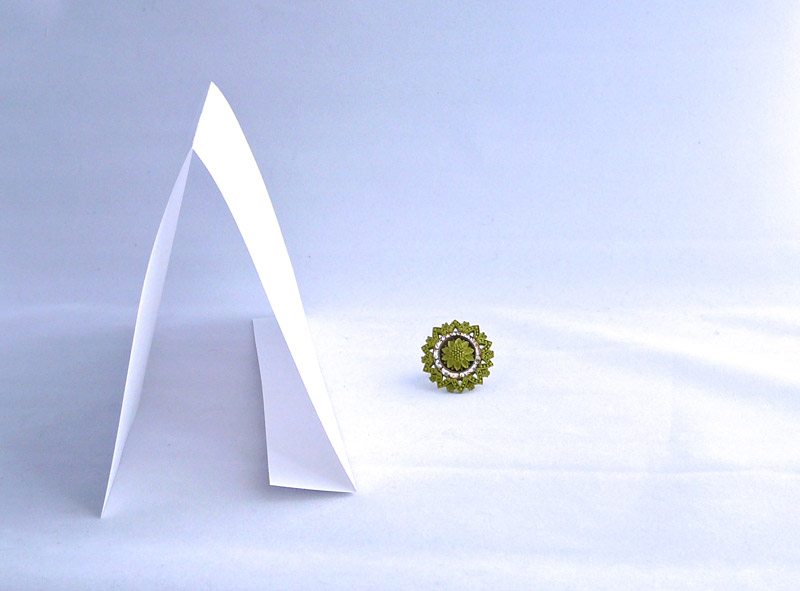
If you're shooting very small items, such as jewelry, you can even make a freestanding bounce by folding a sheet of white paper into a triangle shape, as seen here.
You might even find it helpful to use more than one bounce in a shot — one opposite to the main light source, and a second, smaller one to move around. You can place this small bounce between the camera and subject, sending a little light into the front of the shot. Or, you may want to hold that second bounce above the subject, so it reflects light down into it.
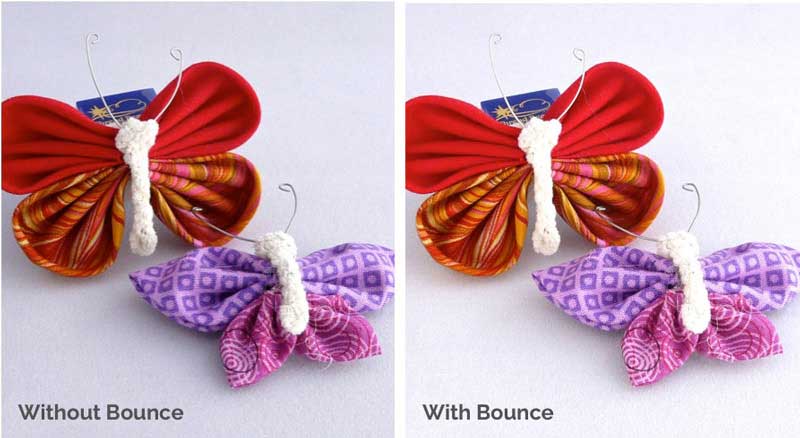
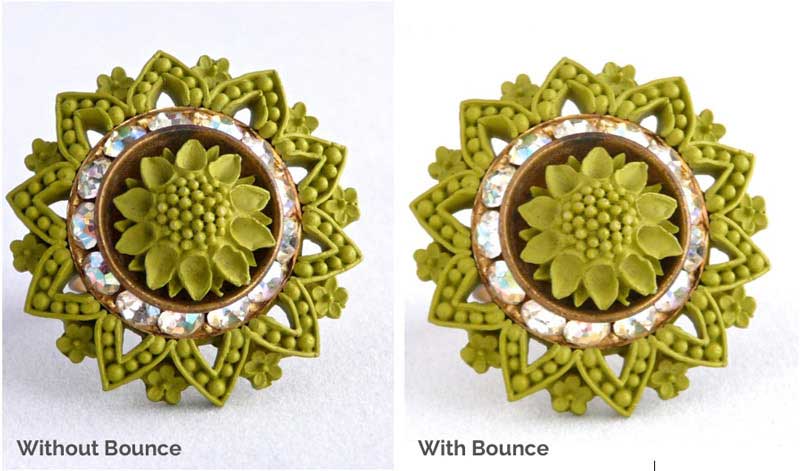
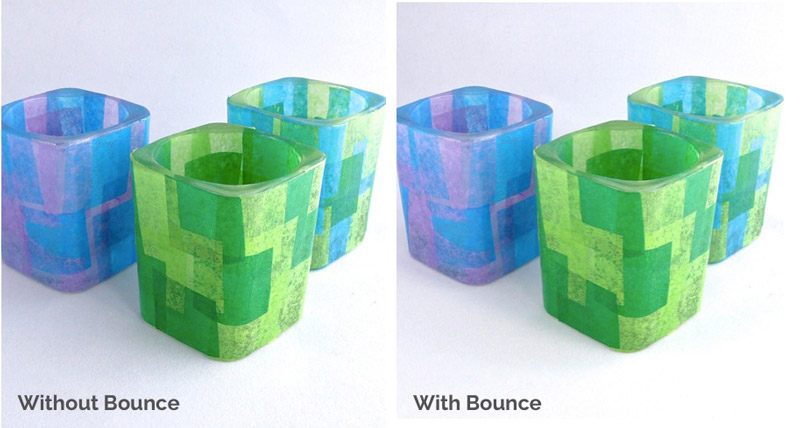
Even in situations where the light is fairly even, you can improve it with bounced light. In the shot at left, the light's fine, but look at the subtle difference created by bouncing a bit more light into the subject.
Bounced light is often a key to making a product look its most appealing. The next time you shoot, try placing some white poster board in different places around your subject and see what happens.
Bonus: If you want to learn more about photography and taking better photos, try a photography course from NYIP today! Request your free photo course catalog here.


