

Panning is a photography technique that is often associated with sports photography. Usually for sports, the photographer is trying to show motion in the background and capture a crisp subject. For this to work, you need a slow shutter speed, and it works best with a tripod.
In the image below, I was standing still as my model rode by me on a bicycle. I shot it with a shutter speed of 1/40. With an ISO of 100 and full sun, my aperture was at f/13.
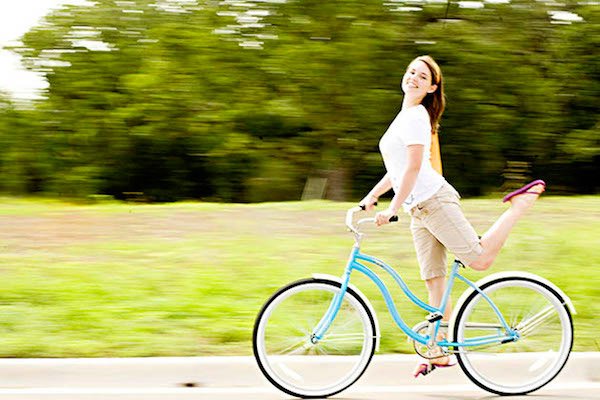
Do you see how the background is almost moving? I've still got some work in this area, as her face isn't as crisp as I'd like. The shutter speed is very slow, yet I moved the camera to keep up with the action. It takes a lot of practice!
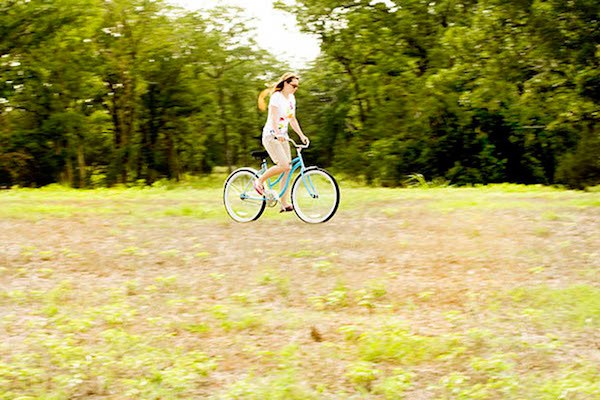
Here is one of my many not-so-great shots:

This was taken with similar settings as the first photo.
Here are some tips to think about when trying panning for the first time.
Panning tips
- Set your camera’s shutter speed to a slow setting, at 1/15th/second or 1/30th/second — slow enough to cause movement when panning the camera. The aperture isn't as much of a concern, as the background will be blurred.
- Set your camera to AI Servo (Canon) or AF-C (Nikon) so you can track the moving subject. With AI Servo, your focus will continually track and not lock in.
- Set the dial to continuous mode so you can take a bunch of images in a row.
- Follow your subject and pan from left to right (or vice versa) while you stand in one spot.
- A tripod is very helpful to keep your camera level while panning. Then you can just move the camera left or right. It’s hard enough to concentrate on the panning speed without worrying about staying level.
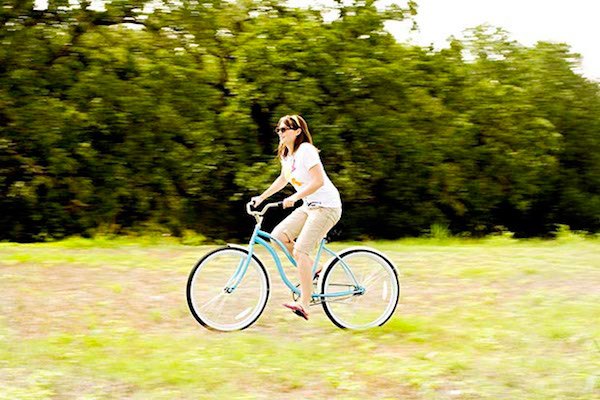
In observing the images above, I captured the sharpest photo when the subject was right in front of me. In both photos, my model was only about 10 feet away from me. When she was further away, the background didn’t have as dramatic of a blurred effect showing motion.
In the image below, my subject is closer, but just a little of the panning blur is shown. This is the clearest image, but it doesn’t have the same motion effect as my first shot above.
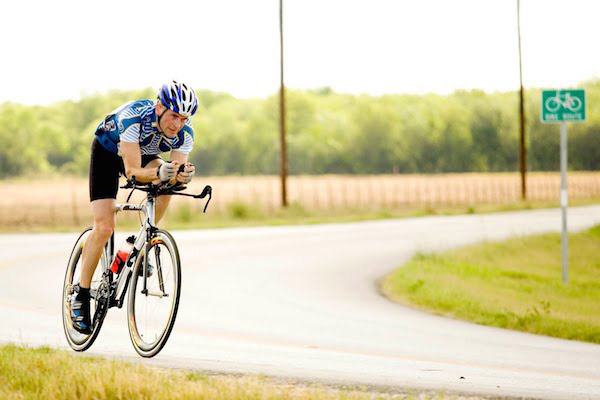
Another way to try panning is to be in a moving car, riding beside someone on a bike as they move. That will allow a bit more flexibility, but it’s quite tough to set up that scene! It also requires three people instead of two — you need a subject, driver, and a shooter. Here I moved along with the subject instead of standing still. I didn’t need a tripod because I didn’t move the camera. The car moved for me, and I stabilized my elbow on the side of the window.
Go out and try something new — have fun with panning!
Bonus Offer: Want to learn how to take better photos? Sign up with NYIP today! Request a Free Catalog here.


