

Have you ever found yourself stuck in a creativity rut where you couldn’t come up with new compositional ideas exciting enough to try? Every so often when we’re scrolling through NYIP’s student forum, we see people asking for fun new ways to stay inspired. If you ever start feeling bored of your current routine and unmotivated to head out and practice innovative techniques, here’s a fun way to mix it up for the day:
If you have plastic wrap laying around in your junk drawer or pantry, you can use some strips of it to make really interesting color filters that will add a special effect to otherwise simple images. Here’s how:
- First you’ll need to gather the proper supplies necessary to put together this simple DIY. For these directions, you’ll need plastic wrap (at least 30cm in both length and width), scissors, a couple of rubber bands and a handful of markers.
- To create different tinted filters, you’ll need to add some color to those pieces of plastic wrap. Depending on how many different hues you want to create, start out by cutting the plastic wrap into that number of 30cm by 30cm pieces.
Want to study photography online? Check out this link to see a full list of NYIP’s courses.
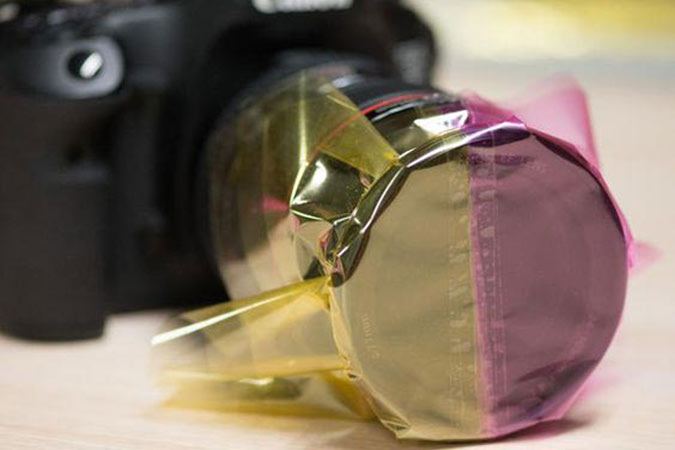
- Once your pieces are cut and ready to go, take the lens you’ll be working with (or its lens cap) and place it on top of the plastic wrap square. Do this for each piece you’ve cut. Trace a circle around the lens outline, then color in that circle using whatever shade of marker you want to try for each.
We recommend using a pretty high quality, heavy duty marker (ideally a permanent marker) for the most pronounced effect. If you use something cheap and washable, the shade won’t be visible enough on your plastic to create the look we’re going for- plus it doesn’t dry as easily and often rubs off and simply makes a mess. - Once these colored portions are ready to go, select the shade you’d like to start with and carefully lay it over the front of the lens you’ll be working with. Then, gently but firmly secure it with one of your rubber bands (be sure not to be too aggressive here or the plastic wrap could tear).
- Now you’re ready to get started with your handmade filters! Since your device is going to need to adjust to the introduction of this unfamiliar element, we recommend working in manual mode when you dive in. Automatic might not be able to effectively adjust as dramatically as you’ll need it to. You should also consider adjusting your aperture to accommodate the fact that the filter will be blocking the amount of light that would normally reach your sensor.
Once you’ve captured a number of shots, we also recommend heading home and playing around in Photoshop to make some final edits. As mentioned before, the filters will definitely be blocking out a great deal of light in your images- so work with saturation adjustments and alter the contrast to accommodate this modification until you’re happy with the final result.


