
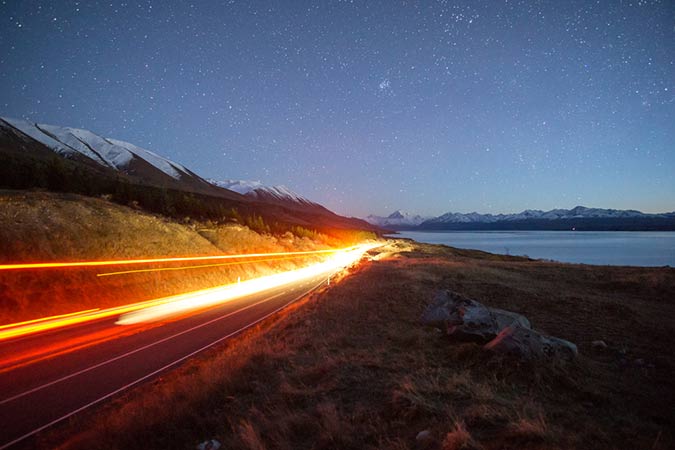

Have you ever seen those futuristic, high-tech looking photos of light trails illustrating traffic zooming down a busy highway or city avenue? These light trail shots are a super illuminating way to demonstrate the busy, dynamic energy of a traffic-filled city. If this is a compositional experiment you’d like to try, here are a few tips worth exploring before you head out:
How to Photograph Car Light Trails- Chose a smart location. Make sure to pick a road where you’re sure there will be a decent amount of consistent traffic. Pick a busy main street, and position yourself so that you’re seeing the backs of cars zooming away (if you have to pick from one or the other on a one-way). It’s a lot easier for you to control the intensity of light if you’re photographing the taillights of the cars as they drive away.
- You should arrive to the location you’d like to photograph about a half hour before the sun is scheduled to go down that day (these are things you can and should research and know precisely beforehand). This 30 minute window will give you time to plan the photo and find a safe, picturesque location from which you can work. An overpass is a great option, or a median that can be safely accessed and one that is not dangerous for pedestrian traffic.
- Make sure your camera is steady and secure. You’ll need a tripod for this- you’re not going to want to, nor be able to, keep your hands and arms still enough to capture this shot effectively otherwise. Pick a heavy tripod if you have the option- this should accommodate for any windiness that could otherwise shake your device a bit. If you can help it, try not to put up the middle extension tube- this is more likely to introduce shakiness.
- Use the camera’s live view option to choose your point of focus. Pick something you want to specifically focus on somewhere a bit deeper in the frame- if you’re photographing a parkway below from an overpass walkway for example, consider picking a sign somewhere up the road to use as your focus point. After you pick that point, set your lens back to manual focus. Focus on the sign or whatever object you chose, then keep your camera in manual focus, so that the camera doesn’t then change focus when you press the shutter button.
- We recommend you shoot at a shutter speed somewhere between 10 and 20 seconds. This will give each car that drive by enough time to get through the entire frame. You should also use an aperture somewhere in the mid-range, such as f/8.
Want to learn how to use your digital camera?


