

There are truths which one can see only when it’s dark.
-Isaac Bashevis Singer
Night photography has its challenges, but the potential for magic makes all the effort worthwhile. Sometimes the most mundane of locations come alive at night. Rainy or foggy nights are especially celestial. So put down the remote, and get out there and photograph something magical! (After you read these helpful tips, that is.)

What to Bring For Night Shooting
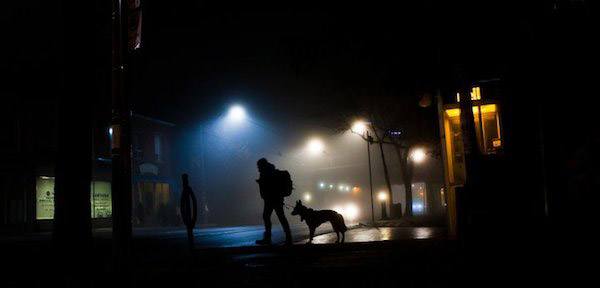
1. A good sturdy tripod: A tripod is not always required when shooting at very high ISOs, but for those of you who like to shoot at lowest possible ISO for reduced noise, a tripod is a must. I set up the shot for composition and then wait for the "decisive moment" to reveal itself. For example, silhouetted figures can provide a narrative to your image. Tell stories with your images for maximum impact.
2. Wide angles lenses and fast primes: Buy the best lenses you can afford. The better the lens, the more detail it can render. The corners are much sharper with higher-end lenses. For Nikon shooters, the 12-24mm/f2.8 is a fantastic lens. The 16-35/f4 is a great option too. It is not as sharp (very close however!) and fast as the 12-24/f2.8, but it uses standard thread-on filters and is a better price point. Plus you get the added bonus of vibration reduction.
Canon owners can opt for the 17-40/f4, which is a weather-sealed pro-level lens at a great price. If you have the funds, then get the 16-35/f2.8. It is the choice of many top pro shooters. Zeiss makes nice lenses with excellent build quality if you don't mind shooting manual focus. The 15mm/f2.8 is fantastic but pricey at $3,000. If you shoot architecture at night, then a tilt shift lens is worth looking into. The Canon 17mm/f4 T/S is superb!
3. A meter: A meter comes in handy for tricky lighting scenarios and allows you to set up a shot quickly without too many test shots. You may miss the decisive moment while fooling around with settings. Also, judging images from your LCD screen at night will lead you astray. Your images may look well exposed, but most likely they will be underexposed. Trust your hand-held meter, and learn to read your camera's histogram.
4. Protective rain gear: Keep out the elements and grab some rain gear for you and your camera. Shooting is much more enjoyable when you are not stressing out about water damage and wet feet.
5. A flashlight: Bring a flashlight for finding errant lens caps and other items you may have dropped while setting up the shot. In a pinch, the light from your phone will do. On occasion, I use a flashlight to paint with light and illuminate dark parts of the composition.
6. A newspaper: A newspaper is good for killing time while shooting long exposures, and it’s also great to kneel or lie on to get better angles without getting covered in street gunk. Recycle it when you’re caught up on current events and finished protecting your favorite chinos!
7. Cable release: Last but not least, a cable release is a must for tack-sharp images when shooting long exposures. In a pinch, use your camera’s self-timer to reduce any camera shake when pressing the shutter release button.
Techniques and Tips for Night Photography
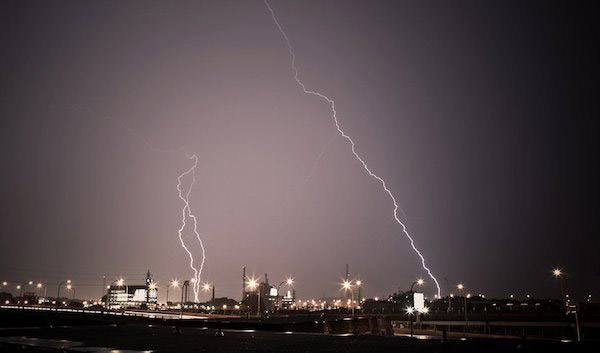
- Good fast lenses are ideal for shooting the night sky. Since you are focusing at infinity, depth of field is not an issue. Crank up the ISO on newer digital cameras for striking effects. Exposures will be around 60 seconds at ISO 6400 at 2.8 (give or take). However, you'll need to be away from city lights to capture the wonders of the night sky. Try it out the next time you go camping or get lost in the desert.
- For those of you who shoot urban landscapes, shooting at F22 will give streetlights a starburst effect without the use of filters. For the sharpest possible image, use F5.6 to F8, depending on the lens.
- Use your camera’s live view mode for focusing. It is great for when you are shooting from an awkward angle. I'll often zoom in when using live view mode to check focus.
- Set your camera to tungsten mode to prevent images from being too warm. Most street lamps are very orange and can be dialed back a little in postproduction to achieve a more cinematic look.
- Shoot in RAW for best latitude in postproduction. I always shoot RAW because JPG mode just doesn't cut it.
The sky grew darker, painted blue on blue, one stroke at a time, into deeper and deeper shades of night.
-Haruki Murakami
Night photography is great fun and very rewarding creatively, so grab your gear and get out there tonight. Keep shooting!
Bonus: Want to learn photography? Enroll in an online photography course from NYIP today!


